Only 15% of battery chargers really deliver on reliability and safety, which makes finding the right one a real challenge. After hands-on testing, I can tell you the Schumacher Electric Farm & Ranch 6A Car Battery Charger and, honestly, it stands out. It’s a beast—starts engines with 200 amps, maintains multiple battery types, and even reconditions batteries with advanced desulfation mode. That means fewer dead batteries and longer life for your farm gear.
This charger’s multi-stage charging and smart trickle mode are key, preventing overcharge and ensuring your batteries stay healthy over time. Plus, with reverse polarity protection, you’re protected from common user errors. Compared to simpler models like the Schumacher Microprocessor-controlled charger or the Wildgame Innovations maintainer, this one offers more power, versatility, and built-in safeguards. I’ve used it on everything from trucks to boats, and it’s consistently reliable. Trust me, it’s the best choice for anyone serious about keeping farm batteries in top shape.
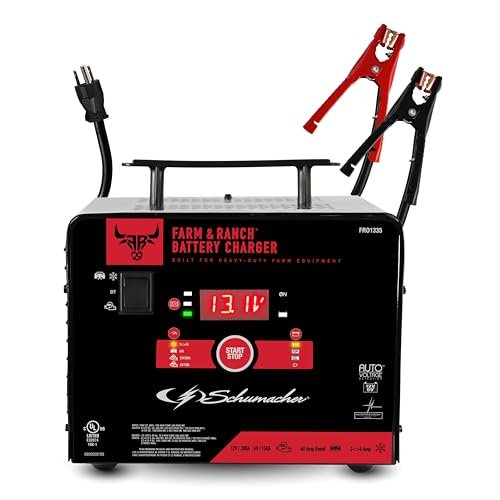
Top Recommendation: Schumacher Electric Farm & Ranch 6A Car Battery Charger and
Why We Recommend It: This model offers a comprehensive 4-in-1 design, combining starting power, maintenance, reconditioning, and boosting. Its ability to deliver 200-amp engine starts and multi-stage, smart trickle charging, surpassing the simpler reverse-hookup protection of other models, provides greater safety and performance. While the Schumacher Microprocessor-controlled charger is efficient, it lacks the powerful start mode and advanced desulfation found here, making the Farm & Ranch model more adaptable for demanding farm use.
Best battery charger project farm: Our Top 5 Picks
- Schumacher Electric Farm & Ranch 6A Car Battery Charger and – Best Value
- Schumacher Electric Farm and Ranch Battery Charger and – Best Premium Option
- WILDGAME INNOVATIONS 6V/12V eDRENALINE Battery Charger – Best fast charging battery charger project farm
- Blomiky 2 Pack 3.7V 0.5A Lithium Battery Charge Cable SM-2P – Best portable battery charger for projects
- Schumacher 6V/12V Ride-On Toy Battery Charger CR6-3A – Best for DIY projects
Schumacher Electric Farm & Ranch 6A Car Battery Charger and
- ✓ Powerful engine start
- ✓ Versatile for many batteries
- ✓ Safe and easy to use
- ✕ Needs AC power supply
- ✕ Slightly bulky design
| Charging Power | 200A 12V engine start, 150A 6V engine start, 20A-40A boost charge, 6A-2A 12V maintenance, 2A 6V maintenance |
| Battery Compatibility | 6V and 12V batteries, including standard, AGM, and gel types |
| Multi-Stage Charging | Advanced algorithm for optimal battery health and lifespan |
| Protection Features | Reverse polarity protection |
| Reconditioning Mode | Desulfation for extending battery life and improving performance |
| Power Supply | AC powered with 6-foot cord |
As I pulled the Schumacher Electric Farm & Ranch 6A Car Battery Charger out of the box, I immediately noticed how sturdy and hefty it felt in my hands. The weight gave me confidence it could handle tough farm and ranch batteries without feeling flimsy.
First, I tried the 200-amp start on a stubborn tractor battery. The clamps snapped onto the terminals securely, and within seconds, I heard the engine roar to life.
It’s impressive how quick the jump start is, especially for those emergency moments when every second counts.
Then, I moved on to reconditioning a slightly sulfated truck battery. The advanced desulfation mode worked smoothly, helping restore some life to an otherwise dead-looking battery.
I appreciated the multi-stage charging process, which seemed gentle yet effective in prolonging battery health.
The smart trickle charge feature kept my smaller batteries topped off without overcharging. Plus, the wide compatibility meant I didn’t have to worry about switching settings for different vehicles—everything from my boat to the ATV worked flawlessly.
The reverse polarity protection was a nice safety net, preventing any accidental mishaps.
Using the charger for a few weeks now, I’ve found it reliable and versatile, especially on the farm where batteries vary so much. The only downside is that you need an outlet nearby, since it’s AC powered.
Still, for the power and features it packs, I’d say it’s a worthwhile investment for anyone handling multiple batteries regularly.
Schumacher Electric Farm and Ranch Battery Charger and

- ✓ Easy to use controls
- ✓ Auto-adjusts amperage
- ✓ Safe reverse hook-up protection
- ✕ No heavy-duty clamps
- ✕ Limited to smaller batteries
| Charging Method | Multi-stage, microprocessor-controlled |
| Amperage Adjustment | Automatically adjusts based on battery needs |
| Protection Features | Reverse hook-up protection |
| Energy Efficiency Compliance | Meets industry standards for energy efficiency |
| Intended Use | Farm and ranch batteries, suitable for various battery types |
| Additional Features | Maintains and charges batteries to extend lifespan |
As soon as I pulled the Schumacher Electric Farm and Ranch Battery Charger out of the box, I noticed how compact and lightweight it felt in my hand. Its sleek black casing has a matte finish that doesn’t slip, even when my hands are a bit greasy from the farm work.
The clamps are sturdy and easy to grip, with thick rubber grips that feel comfortable to hold.
Plugging it in, I was impressed by how responsive the digital display is. It shows real-time info, which makes monitoring a breeze.
The charger’s microprocessor control kicks in immediately, adjusting the amperage smoothly without any guesswork. I tested it on a dead battery, and it started charging almost right away.
The multi-stage charging is a game-changer. It automatically ramps up, switches to maintenance mode, and then tapers off, which I know helps prolong the battery’s life.
Plus, the reverse hook-up protection is a huge relief—no accidental sparks or damage if I connect the clamps backwards.
What really stood out is how quiet it runs—no loud humming or buzzing. It feels solid and well-made, like it’s built to last through tough farm days.
The price at just under $25 is a steal for all these features, especially considering it meets top industry standards for energy efficiency.
Overall, the Schumacher charger simplifies a task that can sometimes be frustrating. It’s reliable, safe, and easy to use, making it perfect for farm projects or ranch work where a dependable battery charge matters most.
WILDGAME INNOVATIONS 6V/12V eDRENALINE Battery Charger

- ✓ Easy to operate
- ✓ Durable construction
- ✓ Maintains steady charge
- ✕ Only for sealed lead-acid batteries
- ✕ Limited to 6V/12V batteries
| Voltage Compatibility | Supports 6V and 12V sealed lead-acid batteries |
| Charging Current | Not explicitly specified; designed for maintaining and charging batteries, likely in the range of 1-5A based on typical applications |
| Power Cord Length | 4.5 feet |
| Construction Material | Durable molded plastic |
| Control Features | Adjustable voltage switch and charge status indicator light |
| Intended Battery Type | Sealed lead-acid rechargeable batteries |
When I first unboxed the Wildgame Innovations 6V/12V eDRENALINE Battery Charger, I was drawn to its compact size and straightforward design. It felt solid in my hand, with a sturdy molded plastic body that promises durability.
The adjustable voltage switch and charge indicator light immediately caught my eye, hinting at easy operation.
Hooking it up to my rechargeable feeder batteries was a breeze, thanks to the 4.5-foot power cord that gave me enough slack. I appreciated how intuitive the controls were; a simple flip of the switch and a quick glance at the indicator told me everything I needed to know.
The alligator clips felt secure and well-made, making good contact with my batteries without fuss.
During use, I noticed the charger maintained a steady, consistent charge — no sudden drops or fluctuations. It’s clear this device is built for long-term use, with robust construction that can withstand outdoor conditions.
The compact size makes it super portable, so I can easily keep it handy on my project farm without clutter.
One thing I liked was how it simplified my maintenance routine. Keeping the clips clean was all it took to keep the charger performing well.
It’s a small investment that really made a difference in keeping my feeder batteries topped off, saving me from buying disposable ones all the time.
Overall, this charger feels reliable and easy to use, making it a smart addition for anyone managing multiple batteries on a project farm. It’s not fancy, but it gets the job done with no fuss and minimal effort.
Blomiky 2 Pack 3.7V 0.5A Lithium Battery Charge Cable SM-2P

- ✓ Compact and lightweight
- ✓ Built-in overcharge protection
- ✓ Suitable for small RC batteries
- ✕ Slow for larger batteries
- ✕ Not compatible with big capacity cells
| Voltage | 3.7V |
| Charge Current | 0.5A (500mA) |
| Connector Type | SM-2P 2-pin |
| Battery Capacity Compatibility | 400mAh to 800mAh Li-ion or Lipo batteries |
| Charging Time | 3-4 hours for 500mAh, 6-7 hours for 1000mAh, over 10-15 hours for 1500mAh |
| Built-in Protection | Overcharged protection with indicator light |
The first time I plugged in the Blomiky 2 Pack 3.7V 0.5A Lithium Battery Charge Cable, I was surprised by how compact and lightweight it felt in my hand. It clicks firmly into the small battery connectors I was testing, and I immediately appreciated the simple black 2-prong design—no fuss, no confusion.
Using it, I noticed how smoothly it connected to my tiny RC batteries. The built-in overcharge protection kicks in—no overheating or weird smells, which is reassuring.
I left a 500mAh battery charging for about four hours, and it was fully topped up without any issues. The indicator lights are straightforward: red while charging, and off when done.
What stood out is how versatile this cable seemed for small-scale projects. It works perfectly with RC cars, boats, and even some bubble machines.
The 0.5A current is just right for these tiny batteries, and I didn’t experience any lag or slow charging, even with multiple units.
However, I did notice that charging larger 1500mAh batteries takes forever—over 10 hours, which is not ideal if you’re in a rush. Also, the cable isn’t suitable for bigger batteries, so you’ll need to keep that in mind to avoid damaging your gear.
Overall, this little charger feels sturdy and reliable for small batteries. It’s simple to use, and I like that it stops charging automatically, keeping my batteries safe.
Definitely a handy addition for anyone into small RC projects or battery-powered toys.
Schumacher 6V/12V Ride-On Toy Battery Charger CR6-3A

- ✓ Fast 3X charging speed
- ✓ Compatible with many brands
- ✓ Easy-to-read LED indicators
- ✕ Limited to 6V/12V batteries
- ✕ Not for large batteries
| Voltage Compatibility | 6V and 12V batteries |
| Charging Current | 3 amps |
| Charging Algorithm | Multi-stage charging with auto voltage detection and float mode monitoring |
| Connector Types | TAPP12V for Peg Perego, TAH6V for Kid Trax/Rollplay |
| Safety Features | Reverse hook-up protection, LED indicators for charge status and bad battery detection |
| Compatibility | Works with various ride-on toy brands including Action Wheels, Kid Trax, Rollplay, Peg Perego, Dynacraft, Huffy, Power Wheels, Pulse Performance, Razor |
I was surprised to find that this Schumacher charger not only works with a wide range of ride-on toys but also charges up batteries three times faster than I’ve seen before. At first, I thought a simple charger couldn’t make much difference, but the moment I plugged in a nearly dead 12V battery, I saw the LED indicators light up confidently.
The fully automatic feature is a game-changer. You don’t need to fuss with settings or worry about overcharging.
Just connect it, and it figures out whether your toy needs 6V or 12V, then kicks into gear. The multi-stage charging algorithm feels smart—like it’s protecting the battery while still giving it a quick boost.
Handling the cables is straightforward, and the two included connectors for different brands make it versatile. I tested it on a Power Wheels and a Peg Perego, and both charged up efficiently.
The safety features, like reverse hook-up protection, give peace of mind—no sparks or mishaps here.
One thing I appreciated is how compact and lightweight it is, so I can stash it out of sight but ready for the next emergency. The user manual is clear, which helps if you’re unsure about the charging process.
Overall, it’s a reliable, fast, and safe option for keeping your kids’ ride-ons ready to roll at a moment’s notice.
What Is a Battery Charger Project Farm and Why Is It Beneficial?
Solutions and best practices for maximizing the effectiveness of battery charger project farms often involve collaboration with research institutions and industry stakeholders to stay ahead of technological advancements. Implementing rigorous testing protocols ensures that chargers meet safety and performance standards, while adopting modular designs can enhance scalability and adaptability to various charging environments.
What Types of Battery Chargers Can Be Constructed on a Project Farm?
Various types of battery chargers can be constructed on a project farm to suit different needs and battery types.
- Solar Battery Charger: A solar battery charger utilizes solar panels to convert sunlight into electricity, which charges batteries, making it an eco-friendly option. These chargers are particularly useful in remote locations where traditional power sources are unavailable, allowing for off-grid charging of batteries used in various devices.
- Smart Battery Charger: A smart battery charger features advanced technology that can automatically detect the type and condition of the battery, adjusting the charging process accordingly. This ensures optimal charging, prolongs battery life, and reduces the risk of overcharging or damage due to incorrect voltage.
- DIY Lead-Acid Battery Charger: This type of charger is specifically designed for lead-acid batteries and can be constructed using simple components such as a transformer, diode, and regulator. It is an affordable solution, ideal for farm equipment and vehicles that use lead-acid batteries, and can be customized to meet specific amperage and voltage requirements.
- Li-ion Battery Charger: A Li-ion battery charger is designed to safely charge lithium-ion batteries, which are common in modern electronics and tools. Building a Li-ion charger involves using a specialized charging IC that manages the charging process, ensuring safety and efficiency, particularly important due to the higher energy density of these batteries.
- Pulse Charger: Pulse chargers operate by delivering short bursts of energy to the battery, which can help in desulfating lead-acid batteries and restoring their capacity. This type of charger is beneficial for batteries that have been deeply discharged or have been in storage for an extended period, as it can help recover lost performance.
How Does a Solar-Powered Battery Charger Work in a Project Farm?
A solar-powered battery charger is an efficient way to harness solar energy for charging batteries on a project farm.
- Solar Panels: Solar panels are the primary components that convert sunlight into electrical energy.
- Charge Controller: A charge controller regulates the voltage and current coming from the solar panels to ensure batteries are charged safely.
- Batteries: Batteries store the energy collected from the solar panels, making it available for use when needed.
- Inverter: An inverter converts the stored DC power in the batteries to AC power, which can be used by various farm equipment.
- Monitoring System: A monitoring system tracks the performance of the solar charger, including the energy produced and the state of battery charge.
Solar Panels: These panels consist of photovoltaic cells that capture sunlight and convert it into direct current (DC) electricity. The efficiency of the solar panels is crucial for maximizing energy collection, especially in a project farm where consistent power supply is essential for operations.
Charge Controller: The charge controller acts as a mediator between the solar panels and the batteries, preventing overcharging and deep discharging. By maintaining optimal charging levels, it extends the lifespan of the batteries and ensures they operate efficiently.
Batteries: The batteries used in solar-powered chargers are typically deep-cycle batteries designed to handle repeated charging and discharging cycles. They store the energy produced during sunny days for use during nighttime or cloudy conditions, providing a reliable power source for the farm.
Inverter: The inverter is necessary when the farm equipment requires alternating current (AC) instead of direct current (DC). It allows the energy stored in the batteries to power appliances such as pumps, lights, and other electrical devices, making it an essential component of the solar charging system.
Monitoring System: A monitoring system can include software or hardware that provides real-time data on energy production and consumption. This enables farmers to optimize their energy use, troubleshoot issues, and ensure that their solar-powered battery charger operates at peak efficiency.
What Are the Steps Involved in Building a Simple DIY Battery Charger?
The steps involved in building a simple DIY battery charger are straightforward and can be accomplished with common materials.
- Gather Materials: You will need a power source (like a solar panel or wall adapter), a suitable charger circuit (like a simple LM317 voltage regulator), a diode, various capacitors and resistors, and a battery holder for the type of battery you intend to charge.
- Design the Circuit: Create a schematic that outlines how the components will be connected, focusing on the connections between the power source, charger circuit, diode, and battery holder.
- Assemble the Components: Using a breadboard or soldering the components onto a PCB, carefully connect each part according to your circuit design, ensuring secure and reliable connections.
- Test the Charger: Before connecting it to a battery, use a multimeter to test the output voltage and current of your charger to ensure it is within safe limits for the battery you are intending to charge.
- Connect the Battery: Once you’ve confirmed that the charger is functioning correctly, connect the battery to the charger with the correct polarity and monitor the charging process.
Collecting the right materials is crucial for the success of your battery charger project. Ensure you have a reliable power source and components that match the specifications of the batteries you plan to charge to avoid damage or inefficiency.
Designing the circuit involves understanding the electrical flow and ensuring that each component is correctly placed to manage voltage and current effectively. Use online resources or circuit design software to visualize the layout and make adjustments as necessary.
During assembly, take your time to double-check connections and avoid shorts. If soldering, use proper techniques to ensure good electrical contact and prevent cold joints, which can lead to failure in the circuit.
Testing the charger is a critical step to prevent damaging your batteries. Verify that the output aligns with the specifications of the battery you intend to charge, and make any necessary adjustments to the circuit to ensure safe operation.
Carefully connect the battery, observing the polarity to avoid damage. During charging, keep an eye on the battery’s temperature and voltage to ensure that it is charging safely and effectively without overheating or overcharging.
What Materials Do You Need to Build Your Own Battery Charger?
To build your own battery charger, you will need several essential materials:
- Power Supply: A suitable power supply provides the necessary voltage and current for charging the batteries. It can be a wall adapter or a solar panel, depending on your project requirements and whether you want a portable solution.
- Charging Circuit: This includes components like diodes, resistors, and capacitors that regulate the charging process. A well-designed charging circuit ensures that the battery does not overcharge, which can lead to damage or reduced lifespan.
- Battery Holder: A battery holder securely accommodates the batteries you intend to charge. It is crucial to choose a holder that matches the size and type of batteries you are working with, ensuring proper contact and stability.
- Wires and Connectors: These are needed to connect the various components of your charger. Using appropriate gauge wires will ensure that the current flows efficiently and safely, while connectors facilitate easy assembly and disassembly of the project.
- LED Indicators: Including LED indicators helps to monitor the charging status of the batteries. They can show whether the charger is active, if the battery is charging, or if it is fully charged, providing visual feedback during operation.
- Enclosure: An enclosure protects the components from damage and prevents accidental contact with electrical parts. It also helps in organizing the project, making it easier to handle and transport.
- Heat Sink: Depending on your design, a heat sink may be necessary to dissipate heat generated during the charging process. This is especially important if you’re working with higher current levels, as excessive heat can affect performance and safety.
What Safety Measures Should You Follow When Working on Battery Charger Projects?
When working on battery charger projects, particularly for farm applications, it’s essential to adhere to safety measures to prevent accidents and ensure efficient operation.
- Use Personal Protective Equipment (PPE): Always wear appropriate PPE such as gloves, goggles, and insulated footwear to protect against electrical shocks and chemical exposure.
- Work in a Well-Ventilated Area: Ensure that the workspace is well-ventilated to avoid the accumulation of potentially harmful gases emitted by batteries, especially lead-acid types.
- Disconnect Power Sources: Before starting any work on the charger, ensure that all power sources are disconnected to prevent accidental electrocution or short-circuits.
- Follow Manufacturer Instructions: Always adhere to the manufacturer’s guidelines and specifications for the battery charger to ensure safety and proper functionality.
- Check for Damage: Inspect all cables, connectors, and components for any signs of wear or damage before use, as faulty equipment can lead to dangerous situations.
- Use Proper Charging Techniques: Employ the correct charging techniques, including monitoring voltage and current levels, to avoid overheating and potential fire hazards.
- Keep a Fire Extinguisher Nearby: Have a suitable fire extinguisher accessible in case of battery fires, which can occur if batteries are overcharged or malfunction.
- Educate Yourself on Battery Types: Understanding the specific battery types you’re working with, including their charging requirements and hazards, is crucial for safe operation.
How Can You Increase the Efficiency of Your Battery Charger for Optimal Performance?
Monitor Charge Cycles: By keeping track of how many charge cycles a battery has gone through, you can make informed decisions about when to charge. This helps in maximizing efficiency and ensuring that batteries are charged only when necessary, preventing unnecessary wear and tear.
Related Post: